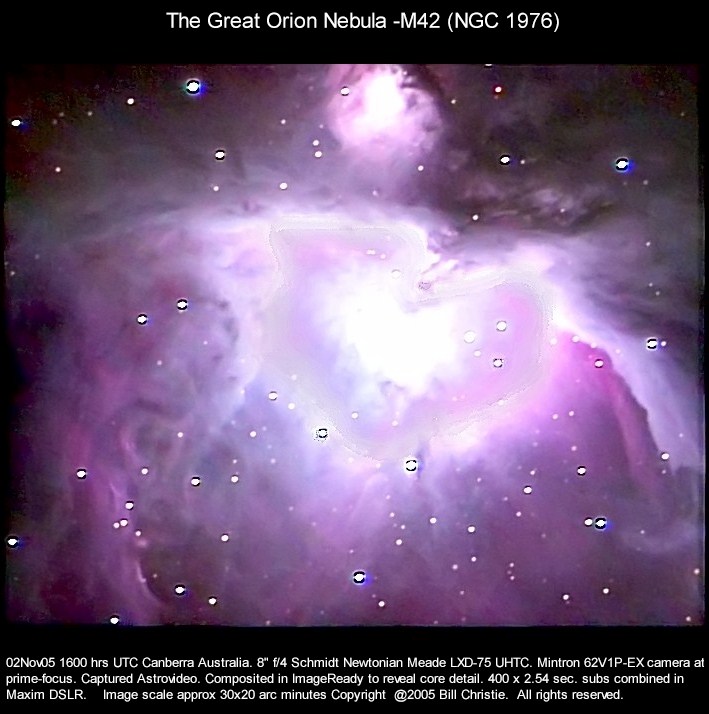
I think this is a nice image. In theory it's supposed to be a lot redder.
The purple tinge is due to improper color balance in the camera, but since nobody can see
in color at those low light levels anyway I decided to just leave this image the way it
is. I love the detail visible near the top-right of the image in that vast
cloud of gas and dust extending into the core.
The amount of detail in the outer areas of this image really surprised me when I first
cranked up the curves in Maxim DSLR. The bright image leapt out at me. The
little Mintron video camera did a good job. What made the difference was choosing to
stack 400 images. Previously I was stacking only 100. I also enhanced
the method I used in Astrovideo software to capture the images from tape. It took a
lot longer, but I think it has really helped. Instead of taking each image as soon
as the software is ready to grab it, I set Astrovideo to sample the images a full 2.6
seconds apart. The frame rate for the Mintron is about 2.54 seconds (when it's set
to x128 sense-up) so Astrovideo should now only be sampling each frame just
once. That has really boosted the signal to noise ratio, and the result speaks
for itself. I've seen other peoples' images of M42 that were produced with very
expensive cameras that don't have the level of detail that this one has.
Things to improve:
a) The core in this image was saturated white (too bright) for the camera. So
what you do is create a composite of two images. One bright highly processed one and
the other take from the same original image but less processed and therefore darker.
In effect you replace the overexposed core in the centre by blending in the detail
from the darker image. You can see the heart-shaped join where I've inelegantly
replaced the core. I need a clear night to capture another set of data. With
the camera's sensitivity reduced I can get correct light balance and detail in the core
and then make that join go away.
b) The focus looks quite okay but it could improve a little bit. I'm looking
forward to trying out the chickenwire
diffraction focuser I made.
c) I have to find out how to process the image to remove the dark circles around the
brighter stars.
d) Diffraction spikes in the image would be nice I think. Hmm, should I use
masking tape or the chicken wire in front of the objective? The traditional
"star-shaped" spikes you see on many photographs are caused by the struts that
hold a Newtonian telescope's secondary mirror in place. Refractors and Schmidt
Newtonians (like my one) don't have these vanes - so we get nice round stars and no
spikes. A lot of people (me included) like the spikes even though they are not
"real". You can introduce spikes to your photos by placing crossed rods or
wire in front of the telescope to make it create spikes like a newtonian. The dark
halos around stars in my image above are caused by the image processing software.
Techniques exist for removing them.
Back to see more M42
Back to Deep Sky
|
